|
702-658-POOL (7665) |
 |
|

We did a little research and these are the general rules below:
A little water seepage from the back of shotcrete is completely normal if a water source is present in the yard or it rains. Pool builders sometimes even put weep holes to allow for groundwater to come through the back side awaiting plaster in extremely damp climates. The shell will be sealed up during the plaster/finish process from the front to keep water in the pool. We do not seal shells from the backside of the shotcrete as that is not the goal. Gravity will pull any excess water into the ground and it will go down to the water table or evaporate over a short time.
Water weeping through shotcrete or gunite is normal even without weep holes. Gunite or shotcrete is not "waterproof" that is the plaster.
On the other hand you generally don't want the gunite or shotcrete saturated when you plaster. You want some control over the moisture. So generally you don't plaster where there is active weeping. So try to leave all water off around your pool prior to plaster.
We sometimes wait on our plaster if it's rainy till the rain stops and the shell is dry. Some light water and if the shell is a little damp is normal and ok, but if there is too much and it's running or saturated, we wait until it dries out a little.
We have built thousands of pools and several had a little water coming through from the back side of shotcrete. None of those pools ever had an issue with steel expanding so we are not concerned about that happening and we are confident in saying you don't need to be concerned either.
Trees basically look the same under the ground as they do above ground; imagine turning the tree upside down and placing all of the leaves and branches underground. Well that's about the size and what the root system looks like as a general rule of thumb, try to stay outside of the drip line of the tree if possible…but this rule is not set in stone. If space is tight and you really want to save a tree, stay at least fifteen feet from the base (see below for how to protect the tree). If trimming substantial branches is necessary, you will likely want to consult with a local tree expert, oh wait we have one at Greencare.net so just ask us.
It depends on what you’re trying to achieve. If you want as little maintenance as possible, the first impulse is to remove as many trees as you can. But keep in mind all trees are different. Pay attention to how much debris, and what type of debris each tree produces. Fruit and nut bearing trees are an obvious no-no. Other types of trees will mostly drop debris after a storm or in the fall season.
If you want more sun or shade, you’ll need to pay attention to how the sun tracks across the sky and how each tree impacts the space. Remember that the sun takes an entirely different path in the winter VS the summer. Direct sunlight on the pool makes a tremendous difference with regards to water temperature. If you’re pool will not get direct sun for the majority of the day, you may want to consider getting a pool heater.
If you want to protect a tree, a best practice is to place a temporary plastic fence around the base of the tree as far out as possible. This will prevent equipment from striking the trunk as well as prevent the ground around the base of the tree from becoming compacted, which would severely hinder the tree’s root system. If the soil around the base of a tree does get compacted, an air spade can loosen and aerate the soil without damaging the root system.
Many times in a yard with a slope, the pool is installed and dirt is built up on the downhill side. If this dirt is built up on the base of a tree it will eventually cause “root rot” and kill the tree within three to five years. Slightly exposed tree roots at the surface actually help the tree breath properly. One of the worst things you can do is bury or plant a tree to deep.
With regards to concrete pools there is not normally a risk of damage from tree roots. With regards to the patio, it typically takes at least 10 years of growth before a root system can have any impact on a hardscape. As a rule of thumb, try to stay at least six feet away from the trunk with the patio, and if you need to encroach more than you’d like, use concrete pavers as opposed to concrete as they can be removed and re-set after the roots are trimmed (although the roots will likely come back).
With regards to concrete pools there is not normally a risk of damage from tree roots. With regards to the patio, it typically takes at least 10 years of growth before a root system can have any impact on a hardscape. As a rule of thumb, try to stay at least six feet away from the trunk with the patio, and if you need to encroach more than you’d like, use concrete pavers as opposed to concrete as they can be removed and re-set after the roots are trimmed (although the roots will likely come back).
If tree stumps are located within the footprint of the pool or patio they need to be removed. Otherwise, they will eventually decay and leave a tremendous void. A tree with an 18″ diameter stump has a root ball half the size of a VW bug, so it’s important to get it out of there. We will leave three feet of the stump above ground and coordinate removal at the time of the dig to remove and dispose of the stumps. This is time consuming and hazardous so it will cost extra, but it needs to be done.
If the stumps are located outside of the pool/patio area they can be ground down with a stump grinder done by a specialist. If you do not designate which stumps to grind, the tree guy is likely to grind them all, which makes the job of pulling the stumps even more difficult at the time of the pool excavation.
Yes, you can always come back and remove a tree after the fact, but it will likely be much more expensive as whoever is doing it will have to work around the pool.
Did you ever swim in the ocean, get a mouthful of seawater, and think, “Yum, I wish my pool at home tasted like this”? Yeah, probably not. Lucky for you and your taste buds, that’s not what a saltwater pool is.
A saltwater pool uses a salt chlorine generator. This means that instead of adding chlorine to the pool water, you add salt, and the generator converts it to chlorine. It’s called a saltwater pool because you add salt to the water at a level high enough to allow the machine to function, which also makes the water feel silkier.
The salt taste is very mild and actually enjoyable. It would need to be around 5,000 ppm (parts per million) to be bad, and the range for a salt chlorinator in a pool is generally 3,000-4,000 ppm. For these pools, the “salt water” is about 1/10 the salinity level of the ocean—it’s more like a teardrop or contact lens solution. If you’ve ever wanted to know what it would feel like to swim in a pool of your own tears, now’s your chance.
The machine has two primary components: the cell and the control board.
The pool water flows through the cell. Inside, a series of metallic grids with a low-voltage current create a reaction that converts the salt down to tiny little bubbles of pure chlorine.
After leaving the chlorinator, this pure chlorine reacts with the water to form hypochlorous acid, which is your end goal.
Pool people’s references to “chlorine” are pretty loose, by the way. There’s all kinds of chlorine variants you can add to the water upfront, but when all the chemistry’s said and done, what’s cleaning your pool water is actually hypochlorous acid, not pure chlorine.
Ground zero for this chemistry is plain ol’ water in the pool and your chlorine additive. Many people use liquid chlorine (sodium hypochlorite) or solid chlorine compressed with cyanuric acid (granular or in tablets). In the case of a salt chlorine generator, you use salt (NaCl).
After you pour that additive into the water and mix it all up, it goes through two different chemical reactions before it reaches the form that will kill algae and bacteria and destroy dirt (the hypochlorous acid).
You have options for the salt:
- Solar salt (organic impurities)
- Mechanically evaporated salt (mineral impurities)
- Mined salt
Use salt that’s only intended for swimming pools, food-grade, granular, and non-iodized.
The higher the salt purity, the less trouble it’ll give you in appearance and maintenance. We recommend 99% purity or higher.
Don’t use rock salt (halite) in your pool. It isn’t pure enough, and it won’t dissolve well. It’ll just give you a headache.
We also recommend you don’t use calcium chloride. Calcium affects the hardness of the water and can form deposits on your pool walls if the concentration is too high.
The salt level should usually be 3,000-4,000 ppm, but check your cell’s rating. Some salt chlorine generators have different ranges.For a brand new pool, add 40-50 lb. of salt for every 2,000 gallons of water. For a pool that’s already done some duty with chemicals, test the water first.
You can use a calculator or chart to figure out how much salt you’ll need to add to reach the ideal ppm.
It usually costs $1500-$2,000 to install a salt chlorine generator. It may seem like a lot upfront, but most folks feel it’s worth the initial investment because they don’t need to purchase chlorine from a pool store.
A salt water pool typically costs $50-$100 per year to maintain. Compare this to traditional chlorine pools, which cost $250-$300 per year.
Replacing the cell unit costs $700-$900 every 3-7 years.
Taking all the expenses into account, using a salt chlorine generator in your pool costs about the same as traditional chlorine.
The cell will typically last 3-7 years.
Your salt levels and maintenance can have a big effect on how long it lives. Keep up with your maintenance to maximize the cell’s lifespan. Take care of your salt chlorine generator, and it’ll take care of you.
These are the primary advantages of a saltwater pool:
- Clear, smooth water
- Lower annual cost
- No chlorine smell
- Gentle on skin and eyes
A salt water chlorinator keeps the water clear.
The water feels silky smooth because of the salt.
It’s less expensive annually.
You don’t have to go to the pool store and lug around big buckets of chlorine.
You don’t have to handle or smell the chlorine because the machine produces it for you.
The chlorine doesn’t burn your eyes or smell when in the pool. It’s easier on your skin and eyes.
There are disadvantages as well:
- More expensive to replace parts
- Easy to forget about water testing
You do have to shell out money to replace parts such as the cell.
It can be easy to neglect the pool. Because the water stays clear and the chlorine level doesn’t burn your eyes or skin, the chlorine can creep up too high without you noticing or checking it. That can damage the pool or pool components because it’s hard on the equipment.
Caution: Even if the chlorine is double or triple the amount it should be, it still won’t burn your eyes or make your skin itchy. Now, if it made it up to twenty times the correct amount, you’d notice. Painfully. But you can’t rely on “well, I didn’t get any chlorine burns today” as an accurate assessment. Do your maintenance and keep your water chemistry balanced.
Most people who work with automatic covers will cover a pool with a salt water system in their warranty.
Time for a shout-out to the unsung heroes: pump and filter systems! Your pool pump circulates the water to distribute the chemicals and filter out particulate matter from the water to keep the water clean, pretty, and safe.
It’s doing you a solid, but it can also be a giant energy hog thanks to all that work. (Plus, extended hard work could wear the pump out sooner than expected. We don’t want that. After all, extended hard work is the worst.)
So how can you get all the benefits without spending extra money on electrical costs you don’t need?
This can get super technical with gross things like words and numbers… But we’ll give a basic answer and a complex answer.
First, though, you’ll need to know your pump’s flow rate and speed options.
How much water does your pump filter in a set time period? That speed is your flow rate. (Note: This is not the same as a turnover rate.)
You can find the flow rate on the manufacturer’s instructions for the pool pump. It’ll be measured in gallons per minute (gpm) or gallons per hour (gph).
The flow rate dictates the size of most pool equipment, water quality, and water clarity.
A single-speed pump has a single flow rate, and that’s it.
Back in “ye olde” days, when everyone had one-speed pumps, most people ran their pumps 6–12 hours a day, on a timer.
A single-speed pump makes things a little simpler in that you don’t have to think about when to turn the speed up or down. You set the timer and let it do its thing.
Unfortunately, this is also its downside. You don’t have the option to run it at a lower speed to save energy.
A two-speed pump is a step up: you can flip a switch between a high speed and low speed.
Now we have the innovations of variable-speed pumps as well.
You can change the flow rate of the pump so that it doesn’t consume as much energy but still moves many gallons of water.
Bonus: lower speeds also means lower noise.
Technology is amazing.
The turnover rate of a swimming pool is the amount of time (usually hours) it takes for the pumping and filtration systems to cycle all of the water in the pool once.
Swimming pools: 8 hours or less (preferred 6 hours or less)
- Wading pools: 2 hours or less (preferred 1 hour or less)
- Spa pools: 1 hour or less (preferred 0.5 hours or less)
Keep in mind that your pool will need to run longer or at higher speeds if you have more swimmers than usual, if the pool gets a lot of sun, or if the weather is warm. A pool in Florida’s climate will likely need more run time than a pool in Ohio’s climate.
As a starting point, though, you can use this formula:
pool volume ÷ flow rate = hours to run the filter for one turnover.
If you don’t know your pool’s volume, you can use an online calculator the pool volume calculator from Pentair.
Let’s say a 17,000-gallon pool like our 40-ft. Crescent cove uses a filter that circulates 2,400 gallons per hour.
(This flow rate is, on average, the middle speed on a variable-speed pump or the lowest speed of a 2-speed pump.)
Using this formula, the filter should run for about 7 hours per day for one full circulation.
Side note: concrete pools generally require 2 full circulations (also called turnovers) per day to maintain clean water…twice the electrical energy required for a fiberglass pool.
If Outside Temperature is:
50-70 Degrees-Water every other day for 10-15 minutes
70-80 Degrees-Water once a day for 10-15 minutes
80-100 Degrees-Water twice a day for 10-15 minutes
Optimum soil moisture depths for sod are 6″ to 8″ below surface.
The first four weeks after installation is a critical period for new sod or seeded lawns. It is very important to keep it moist at all times. Be sure to schedule the final watering no later than one hour before sunset. Leaving lawns wet overnight promotes fungal diseases.
Depending on the time of year plants and trees are usually set for 3 times a day 6 to 20 minutes per time.
- Optimum soil moisture depths for small to medium shrubs is 12″ TO 18″
- Optimum soil moisture depths for large shrubs to trees are 18″ to 36″
- WATER FROM 9AM TO 4PM. DEPENDING ON THE TIME OF THE YEAR EARLIER OR LATER TIMES CAN BE SET AT THE PEAK MONTHS OF THE SUMMER.
The amount of watering time depends on the type of soil in your landscape. Be sure to use proper cycle & soaking methods especially in areas with high runoff potential. Like on sloped areas on the back side of many yards.
Watering less than 3 times per week during the first four weeks after installation can result in distress and drying out of root ball or root zone of your plant material. The amount of watering per day should rarely be adjusted as it is your goal to reach optimum soil moisture depths. Changes to your watering schedule after the initial installation period should reflect the current season, temperatures, and the type of plant material in your landscape.
If outside temperatures are above 95 degrees, schedule your drip system as late in the morning as possible for maximum soil moisture in the hot afternoon hours. Take a look at the Southern Nevada Water Authority website for further details that may affect your watering schedule.
If your landscape area has steep slopes or heavy clay soils, it is especially important to implement proper cycle & soaking schedules. To find the proper schedule, simply divide your total watering time into 2 to 4 start times. Start times should be scheduled within 1 to 2 hours of each other. This pushes the previous watering deeper to achieve your optimum soil moisture depth.
To learn more about proper irrigation for the Las Vegas valley, check out the Southern Nevada Water Authority website or attend one of the many free workshops offered by The Desert Demonstration Gardens or The Cooperative Extension Service.
Please note that fertilizing in summer months is likely to cause plants to burn. We recommend fertilizing in the spring & fall months for the best results. Be sure to spread fertilizer around root ballPALM TREES (Bare Root). It is important to leave your bare root palm trees tied for a minimum of six weeks during summer months. If trees are planted between October and March, they should remain tied until April. It is normal to see tied fronds brown-out. As long as the center heart stays green your tree will recover.
Specialty palm fertilizer is recommended during the months of April to September. Fertilizing in the winter months is not recommended as it promotes new growth that can be damaged by the cold.
When installed, plants will have the necessary vitamins, minerals and amendments to promote healthy growth and will be planted at ground level. If a drip line is installed we will double check to make sure that each plant is receiving the right amount of water. This will not only save water, it will also prevent water damage to concrete, walls surrounding structures. This system is ideal for plants, flowers, and garden areas.
Proper tree development is vital during the first 3 to 5 years to produce a well developed mature tree. Be sure that your gardener or tree service professional is executing proper tree care. No more than 25 % of the tree canopy should be removed within a 1 year period. Trees should be “off the stakes” 2 years after planting & proper pruning techniques should always be utilized. All major tree pruning should be performed during the late fall and winter months. Spring pruning can be extremely harmful to trees. Sap starts to flow heavily in the spring creating opportunity for the slipping of bark and is an open invitation for pests and disease.
Installed plants come with a 90 day Limited Warranty and all irrigation workmanship is guaranteed for one year.
Lawn irrigation – As your lawn matures, the grade will rise. To aide in this process, we use strong Schedule 40 pipe & adjustable lawn head risers. These materials make it easier for you to re-adjust any lawn heads without having to cut into the system. We use Hunter, or Rainbird pop-up lawn heads and all trenching for irrigation systems are the proper depth with the sprinkler heads even with the ground. You can rest assured the pressure vacuum breaker (PVB) valve will be up to code on mainline sprinklers.
Drip irrigation – We use Y filters to prevent micro particles from clogging emitters and we use pressure regulators to reduce the chance of emitters popping off due to pressure changes in the water supply. Top quality “?” poly drip lines are buried below grade to prevent surface damage caused by rock mulch and foot traffic. Pressure compensating emitters are used with the gallons per hour rating best suited for the plant materials.
All installed plumbing comes with a one year Limited Warranty.
We use 2 1/2 to 3 1/2 inches minimum of top quality lawn mix. This amount of soil will save you from having to water as much and gives you better drainage for root growth. The deeper the roots grow the less water you need.
Plant materials are provided with 15 to 30 % blend of organic mulch to promote a healthy soil environment for your new plants and trees. Organic matter improves the moisture retaining capacity of soils by as much as 500%. Non organic mulches are used when planting cacti and succulents. Their native environment is very low in organic matter and use of organic mulches with cactus promotes decay and imminent death.
When it comes to evergreen sod selections in the Las Vegas valley, tall fescue sod is preferred. It is drought and heat tolerant. Hybrid Bermudas are also available in seed or sod. Bermuda grass is more water efficient than fescue, but it is invasive and may spread into your other landscape areas. Bermuda grass goes dormant in the winter, which you can over-seed with rye to keep green.
The Sago Palm has become a very popular landscape item and is the most common cycad used in landscape today. But most people don’t realize that it is not a palm at all. Rather this plant is a Cycad, a totally different type of plant. There are over 200 different types of cycads. Cycads are a group of plants that are very primitive in their origins.
Fossils have been found on almost every continent on the planet.
It is often stated that cycads have evolved little since the days of the dinosaurs. There are species that have gone extinct, while there are others that seemed to show little evolution over millions of years. Therefore as a group, cycads are often referred to as “living fossils”. The scientific name for the Sago Palm is Cycas revoluta.
*Cycas* refers to the genus, the genus refers to a particular group of similar plants *in* the Cycad family and *revoluta* further describes the exact species of the group *Cycas*. The latter was given to this species because of the revolute (to curl back) nature of the leaflets; the edges roll under the leaflet. Many people misspell the name of this cycad as Cycas revoluta or Cica revoluta. The genus is "*Cycas*".
The natural course of leaves on plants, including palms and cycads, is first green, then turning yellow, and finally brown and dry.
The yellow stage is where the frond is losing its chlorophyll as it is being re-absorbed into the plant. The final brown stage is the completion of the nutrients re-absorption process.
If you cut off sago fronds too soon, you are actually depriving your sago palm of its natural technique to conserve nutrients. Best is to wait until a frond is totally brown.
The exception to not being worried about yellow or brown fronds on your sago palm is if they are occurring in the center "new growth" area.
If new fronds soon turn yellow and head for brown, you have a nutrition problem. You are not feeding properly. Sometimes a sago may take a year or two or more to develop the “quick yellowing” symptom. Don’t let that fool you. Food is the answer.
Once your sago palm is well established in its new location usually after one full calendar year it will start to thrive. Sago palms are fairly hardy plants. If the leaves do totally turn brown, trim them off……and wait. You’ll probably get a new batch of leaves next spring.
One rare issue to look for is on the underside of the foliage look for small white specks. A major problem of sagos is the invasive Asiatic Cycad Scale. They can cover the undersides in a few moths sucking the life out of the plant. For treatment, if you find this pest, is to spray the undersides with Organocide after it cools down to day time temperatures in the low 80′s. Or you could try using a systemic, such as Acephate (Ortho Systemic Spray) or Bayer Systemic Rose & Flower Care which has Disyston.
A common problem Greencare encounters in Las Vegas and surrounding areas is water coming through walls and draining from one home to another. On several homes the lots are actually designed this way. Water is going to find the easiest route to get to the lowest elevation. When the builder first started to grade out the land for your development they had to build homes on flat surfaces and steer the water to the lowest point into the eventual storm drain if a heavy rain hit. Most of the water will end up draining into the ground before it gets to the storm drain. In some instances the ground will appear damp for weeks if not months and may never completely dry out if shaded. The goal in drainage planning is to steer the water away from the foundation of your home and sometimes that means from one lot elevation to another lot elevation that is lower.
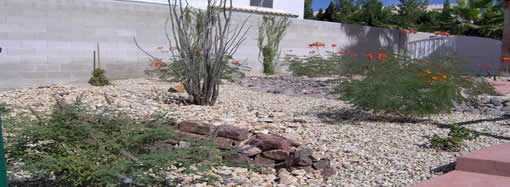
The desert soil in Las Vegas does not drain well in most areas. This is why if you have a drip system in your yard and you are watering regularly there will be areas that potentially always remain damp. The rock may look spotty and damp even in areas that are far away from plants. This does not necessarily mean there is a leak. Decorative rock will also draw water into the rock itself from the ground and sometimes appear damp and spotty even long after the watering timer has stopped. If watering times are set every day or even a few times per week it may never completely dry out. The rock Greencare installed here was laid down over the natural drainage path of the yard and Greencare installed real grass so the rock will often look spotty long after watering. Grass is not native to the Nevada desert so you have to water abundantly and the ground doesn’t drain well so this is what happens. You have to take the good with the bad. Some rocks are more porous than others so some will absorb more water and look damp, it is normal.
The wall seen on the left has a bad case of efflorescence. The white minerals leaching from the mortar have seriously stained both the stone and the mortar.
The first thing to realize is that these mineral deposits are just an aesthetic problem. They do not compromise the structural integrity of any of the masonry in and about your new home. The white powder you see is efflorescence. The brick, stone, concrete block, mortar etc. contain water soluble salts that are the source of the white deposits. Soil behind retaining walls can also contain these same salts.
These trapped salts are set into motion when water enters masonry. The water dissolves the salts and carries them through the masonry towards the surface. Sunlight and wind draw the water to the surface but as the water evaporates, the salts are left behind.
The salts contained in the brick, mortar, stone, concrete block eventually exhaust themselves and the white mineral deposits simply go away. But salts within soil can persist for decades. Each time you try to wash the wall surfaces to remove the salts, you actually compound the problem. The water you use simply soaks into the masonry surfaces and dissolves the salts to create more problems days later. The surfaces typically look fantastic when wet, but the white powder appears again when the surfaces dry.
To stop the efflorescence you must stop all water from entering the masonry so if plants need water to survive you are in a catch 22. Either no plants or deal with the white residue. Efflorescence is very common on new brick and stonework.
When a retaining wall is built then is sealed and is backfilled with dirt even though it was treated with a waterproofing compound you will see water on the other side. There are a few reasons for this: If the house on the other side is at a lower grade the water will come through below the ground level of the higher elevation home, which we can’t stop because we can’t seal below the ground. Water flows downward and once it is below ground level the wall on the lower side will draw the water in and therefore you get the water coming through and the residue on the lower side. Even if the homes are at the same level, at times the water will still come through because CMU blocks will actually draw the water upwards due to the fact they are so porous.
The only way to stop this would have been to seal the entire wall below the ground level when constructed. Sealing walls for future possible water is not common practice with builders. The builder should have done this when the wall was being constructed. It would have taken some time but would have helped stop the water and the efflorescence.
But that’s not normally the case so here we are. Efflorescence happens. It is part of building new things. It eventually goes away after deposits are exhausted, but this process can take years. When possible, it is best to just let the problem diminish on its own.
Stopping water from entering masonry is the best way to make efflorescence stop. But it is not as easy as one might think. Water can enter masonry and travel up, down and sideways! You can actually get efflorescence on masonry walls caused by moisture in the soil that wicks up a wall.
Efflorescence happens naturally as concrete cures.
"I built a retaining wall out of stackable blocks last year, and they are turning white and chalky-looking. When I wet them down, the blocks look great, but when they dry out they look white again. I don’t like what I’m seeing – can you help?” Those powdery white stains on your blocks are likely caused by efflorescence. As concrete cures, the moisture slowly migrates to the surface of the block where it evaporates into the air. Like a candle wick, the water brings dissolved salts and minerals from within the concrete mixture. As the water evaporates, those minerals are left on the surface of your block, giving it a whitish, hazy or streaky stain."
In most cases, this problem is temporary – eventually the salts will all be removed from the concrete, and the efflorescence will stop. How long this takes depends on the ingredients with which the concrete was made, and how long it takes for the concrete to cure and dry out completely. However, with landscape retaining walls, your blocks are constantly being exposed to ground water and hydrostatic pressure, which can force moisture (and more salts from the soil) into the blocks to later show up as efflorescence.
Efflorescence on wall at joints in the underground drainage channel.
Here are some tips for dealing with efflorescence:
- Efflorescence is ugly, but it does not affect the strength or functioning of the block.
- Normal efflorescence should stop once the concrete is completely cured. Ongoing streaky stains or cakey buildup, particularly at joints and cracks, may indicate a problem with water infiltration and drainage.
- It’s important to reduce the amount of moisture that is getting into your wall. Mortared walls should be treated on both sides with a waterproofing sealer. Non-mortared, stackable retaining walls should be backfilled with gravel, with water drainage directed off to the sides. This prevents water pressure from building up in the soil behind the wall (and forcing itself into the concrete blocks).
- Avoid pressure-washing or overly wetting your blocks. This makes them look nice at the time, but it forces water into the concrete, inviting more efflorescence.
- Clean off light stains with a dry, stiff brush, then remove the dust with a damp sponge. If you have heavy stains, try scrubbing with white vinegar. Stubborn stains can be removed with a masonry cleaning solution.
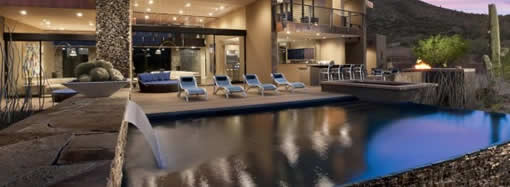
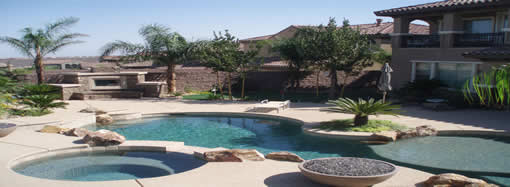
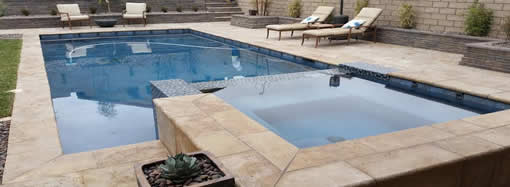
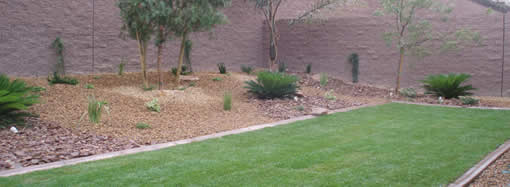
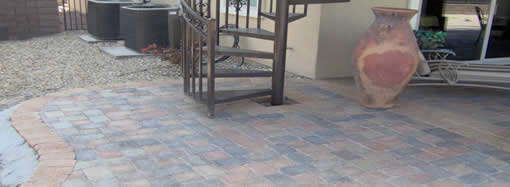
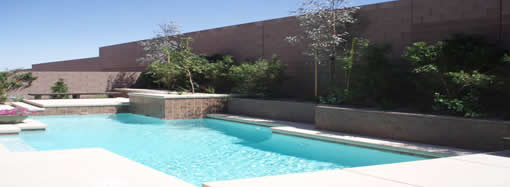
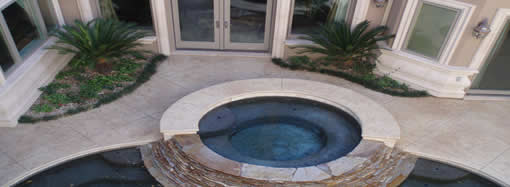
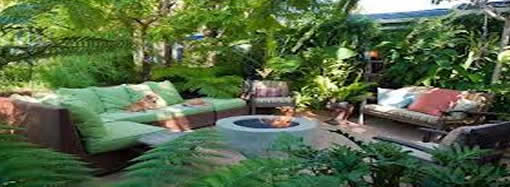
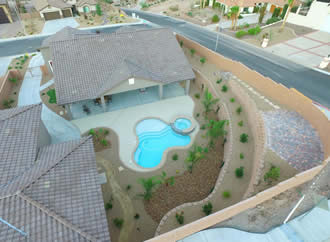
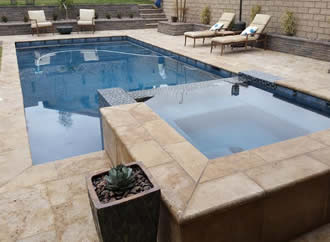
We are a premier provider of custom pool design and construction with custom landscape installation in the Las Vegas, Summerlin and Henderson, Nevada neighborhoods for over 25 years. Our experience and expertise is what people trusts most in Las Vegas. Our custom pool design and installation process is second to none. We focus on every last detail when it comes to creating the paradise you envision, truly transforming your backyard into the favorite room of the house.
6807 W. Gary Avenue
Las Vegas, NV 89139
U.S.A.
Phone: 1-702-839-5296
Email: support@greencare.net
C-10 LIC#77114 C14 LIC#77460 BID LIMIT 140,000.00
A-10 Lic #78730
LIC# 0070475 OR C18 0020977A BID LIMIT 2.5 MILLION
LIC# C5 0029521 BID LIMIT 50,000.00
LIC# C17 48886 BID LIMIT 50,000.00
LIC# 59950 BID LIMIT 30,000.00